Considerations about the installation
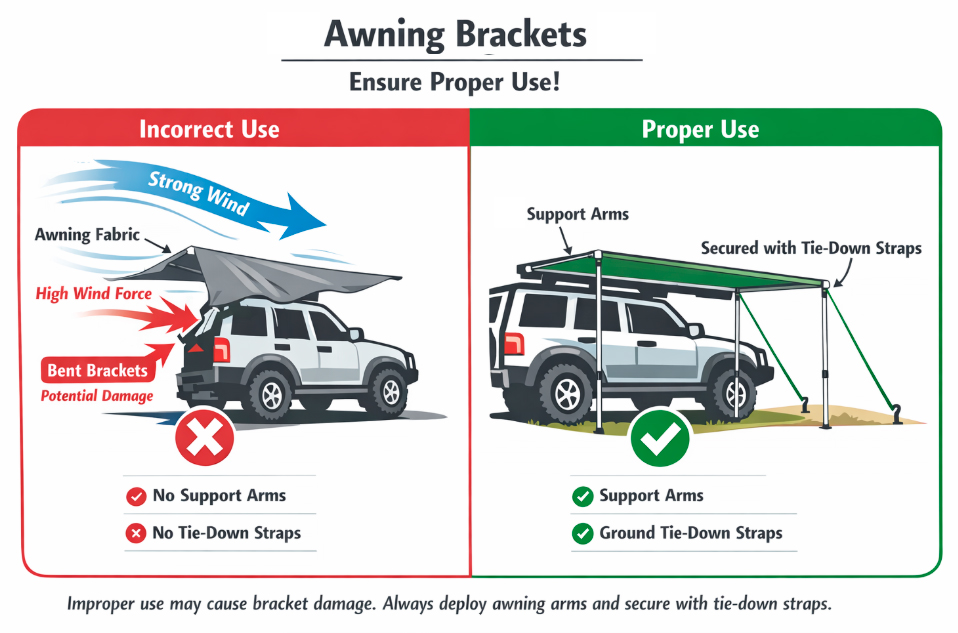
Proper Use
None of our gutter mounted awning brackets are designed to support any Freestanding or swing out awnings with rigid arms.
Fiamma/Thule/Dometic so called hardshell or box awnings are supported by OZ19/OZ20 as long as the lenght/weight ratio proportion of brackets is followed with a common sense installation.
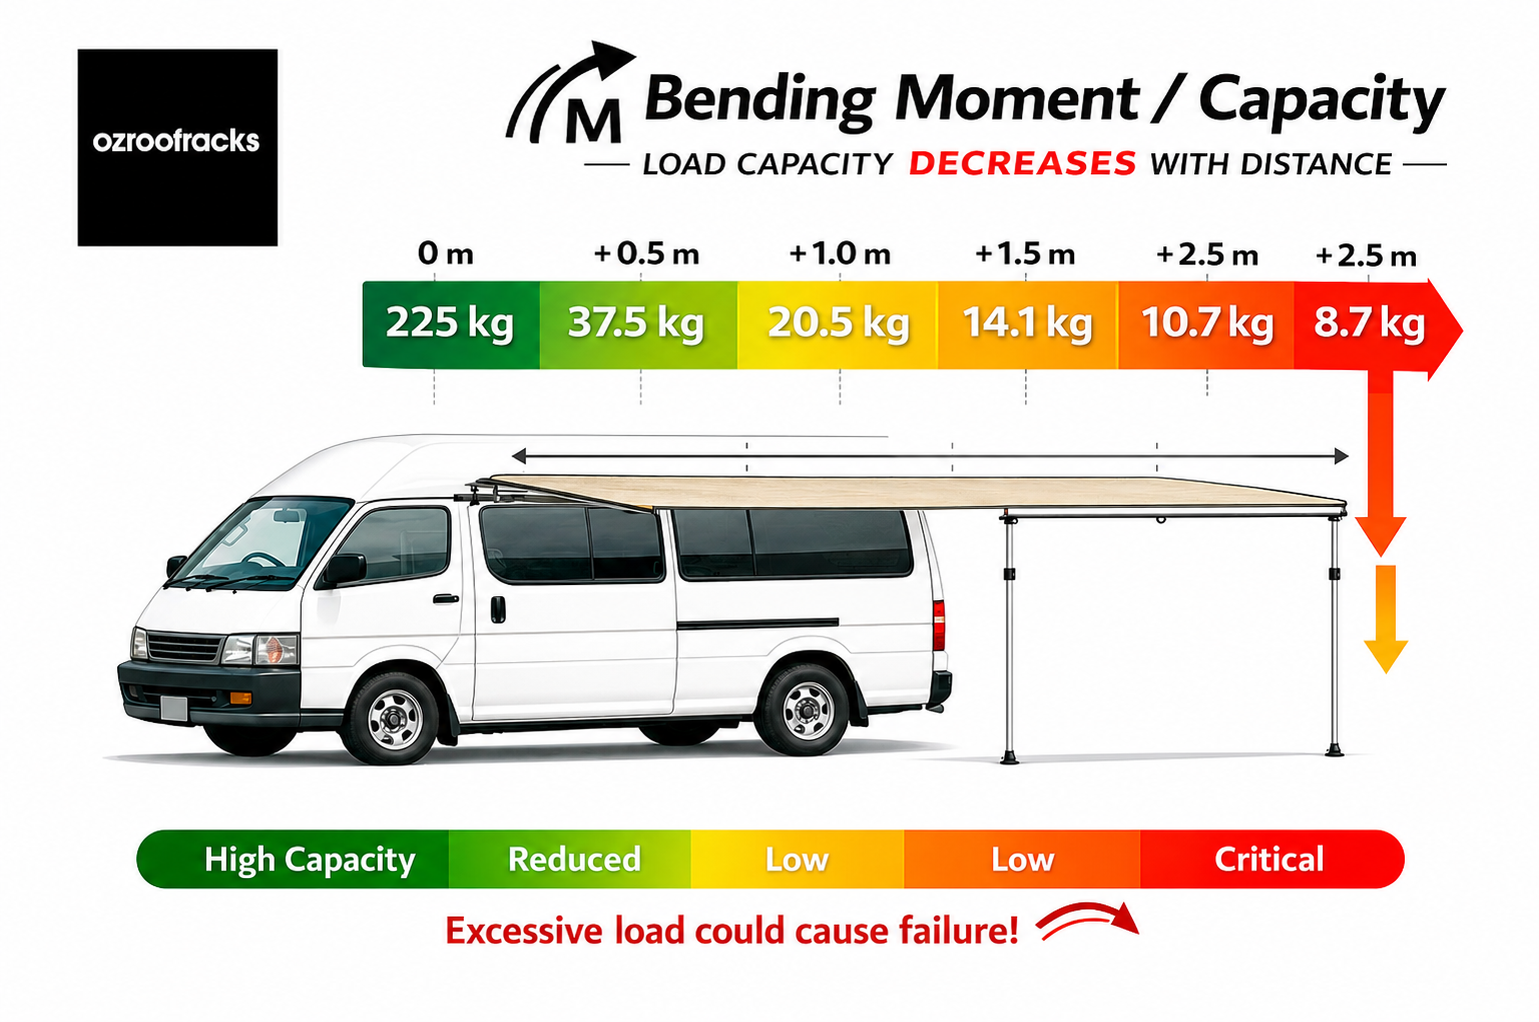
Bending Moment
Once you rollout your awning the bending moment change as you put the weight away from the gutter the bracket stress so always add poles and tie downs and retract your awning if any wind as wind can change the scenario really quick.
Follow manufacturer instructions: roll the awning out no further than 1 metre. Do not extend it fully without support, as the weight can strain the vehicle wall and stress the brackets/gutter.
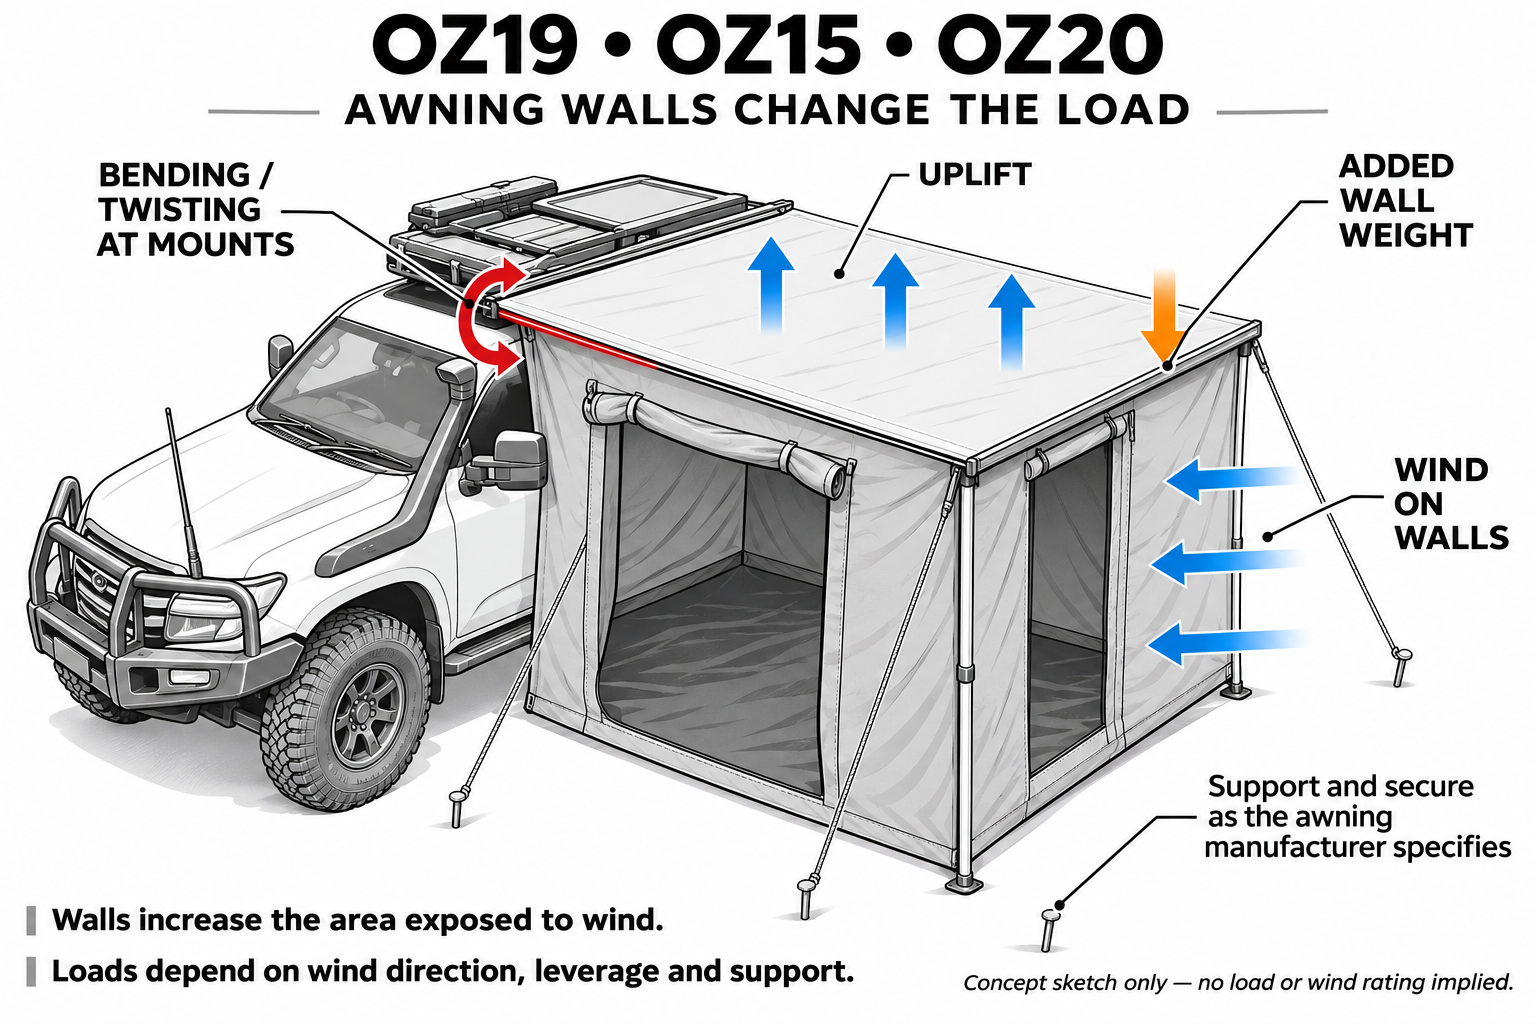
Twisting force, water pooling and bending moment
Awnings are sails under wind force. Adding awning walls changes the load on your mounting system.
Walls add weight and increase the surface area exposed to wind, creating sideways forces, uplift and potentially greater bending and twisting forces on the gutter mount brackets.
The turning force increases with the applied force and its perpendicular distance from the mounting point. Actual loads depend on wind direction, gusts, awning extension, wall configuration and ground supports; the awning’s weight alone does not indicate these forces.
Retract the awning before adverse weather arrives.
PRELIMINARY NOTES
(1) This product includes a range of accessories to facilitate the installation in different vehicle makes/models.
(2) Power tools are NOT REQUIRED to install our product/s. By using power tools you can damage your vehicle and the thread on the brackets.
(3) Avoid snapping the welded nut: Max Torque 25 Nm (18.439 ft-lbs) that means tighter than hand tight + 1/4- 1/2 a turn in most cases.
(4) These brackets are not compatible with any freestanding awning or to mount walls as any increase on the weight far from your gutter changes the bending moment (read attached documentation on product page)
2 WAYS TO INSTALL
The strongest way to install

Step 1 - Check
Make sure you have all the hardware required for each bracket.

Step 2 - Clean
Clean the gutter and make sure there is nothing where you'll place the bracket.

Step 3 - Protect gutter
Place a piece of paper on the vehicle wall to protect it from scratches.

Step 4 - Button screw
Place the button head socket screw on the flat side of the backplate with a nylon washer in between. You don't need a wrench to do this.

Step 5 - Lock with the thin Lock Nut
Now lock with the thin lock nut well tightened on top of the welded nut preinstalled.

Step 6 - Small plate on gutter
Put the small plate set over the gutter.

Step 6 - Rubber on bracket
Now you can stick the mounting rubber to the lower bracket fold to protect your vehicle

Step 7 - Position
Gently position the bracket under the gutter, securing the over gutter plate.

Step 8 - Start tightening
Now you can start tightening the nylon lock nut to the bolt on the bracket.

Step 9 - Finish
Everything should be ready by now to fit accessories and re-check the installation.

Step 10 - Prevent Damage
Check often your installation and make sure that any accessory fitted to the bracket is at least 3-5mm away from the vehicle.

Step 11 - Preventive Treatments
We encourage installers to use a good silicone self-fusing tape, liquid sealant, high density thread seal tape or anaerobic sealant if you're planning a low-maintenance and long-lasting installation.
The easiest way to install
Step 1 - Check
Make sure you have all the hardware required for each bracket.
Step 2 - Clean
Clean the gutter and make sure there is nothing where you'll place the bracket.
Step 3 - Protect gutter
Place a piece of paper on the vehicle wall to protect it from scratches.

Step 4 - Gutter Plate
Put the gutter small plate over the gutter, laying down over the vehicle wall.

Step 5 - Put the rubber
Fit the adhesive rubber on the bracket, where the bracket will contact the vehicle (under gutter - fig.3).

Step 6 - Position
Gently position the bracket under the gutter, securing the over gutter plate.

Step 7 - Avoid snap!
Avoid snap! the welded nut is just to guide the bolt position.

Step 8 - Start tightening
Now you can start tightening the bolt to the bracket.
Max Torque 25 Nm (18.439 ft-lbs) that means tighter than hand tight without forcing.

Step 9 - ALWAYS LOCK
Once you see the bolt thread from the back, place the thin safety lock nut.
Hold super tight!
This is proven to increase x3 times the downwards strength of the bracket.

Step 10 - Finish
Everything should be ready by now to fit accessories and re-check the installation.
Step 11 - Prevent Damage
Check often your installation and make sure that any accessory fitted to the bracket is at least 3-5mm away from the vehicle.
Step 12 - Preventive Treatments
We encourage installers to use a good silicone self-fusing tape, liquid sealant, high density thread seal tape or anaerobic sealant if you're planning a low-maintenance and long-lasting installation.

